
In the evolving field of architecture, effectively merging AI-generated 2D images with your 3D modeling workflows is essential. While the holy grail of AI tools for architects would be one that generates BIM models directly from text or images, current AI 3D tools primarily cater to character and game asset creation, lacking the specificity required for architectural design. Therefore, architects must develop innovative workflows that combine various AI tools to bridge this gap.
In this AI Tool Tip, we’ll look at a quick way to convert a 2D architectural concept image (be that a sketch, photo, or AI generated image) into a 3D model and create consistent, high-quality renders of it from any conceivable angle with only minimal 3D modeling effort.
AI Tool Tip: Bridging the 2D to 3D Gap
This guide demonstrates how to produce comprehensive concept renders from multiple angles using minimal 3D modeling, leveraging the AI rendering engines best suited for architecture.
Step 1: Generate a Base Image
Begin with an initial concept image or sketch. For this one, let’s select the gnarled and knotted sunrise prairie lake house from a previous post.

There are countless image generators that can help with this phase. For a comparison of the best AI image generators to help you decide which might be best for you, click here.
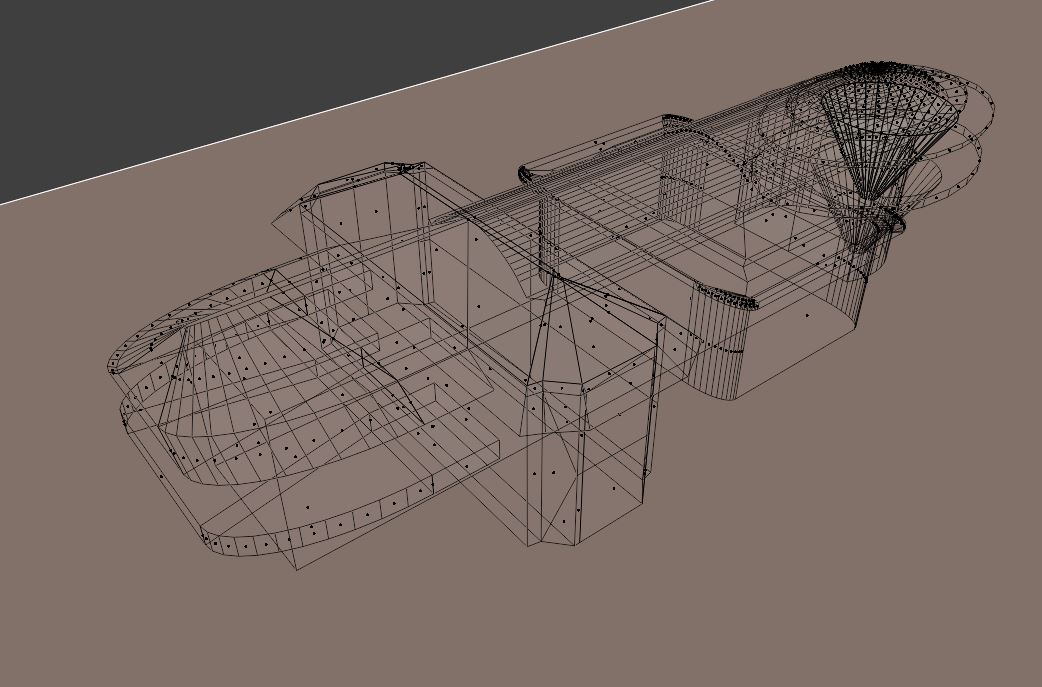
Step 2: Create a Rough 3D Massing Model
Use a free vanishing point calculating software like FSpy to determine the image’s perspective and export it to your 3D modeling tool of choice. For this example we will be using Blender, a free opens source 3D modeling software. You can learn how to use and download FSpy here and you can download Blender here.
With these tools, we can construct a basic massing model to establish the structure’s form.

Step 3 (Optional): Apply UV Mapping
In your 3D model, apply UV mapping to project the original image onto the massing. This step, while optional, helps maintain consistency in textures and features, preventing the final AI rendered image from deviating too far from your initial concept.

Step 4: Capture Model Snapshots
Capture snapshots of your model from various angles, including close-ups, plans, elevations, and perspectives. These snapshots will serve as foundations for your AI-rendered final images, aiding in detailed modeling and presentation.


Step 5: Generate your AI Renderings
-
- Midjourney and Vizcom: These platforms preserve the original massing effectively but may produce textures that appear slightly artificial.
- Recraft: Generates creative results with a stylized, video game-like aesthetic, though it may alter the original massing.
- Krea: Offers adjustable editing strength and a distinctive, crisp style, allowing for quick iterations.
Each tool has unique strengths and limitations. Selecting the appropriate platform depends on the desired style and project requirements.
Alternative AI Methods for 2D-to-3D Conversion
While the above method involves manual modeling, other AI-driven approaches can provide insights into transforming 2D concepts into 3D forms:
AI Video Tools (e.g., Luma Labs):
These tools can be used to generate 3D turnarounds or flybys of a building from a 2D image, offering a dynamic perspective on your concept. These are not the most easily controlled or faithful method and often require keyframe images or a video of a rough 3D model as guidance, but it does give you a better idea of how your AI generated concept might look in a 3D space. Some examples from a few different projects are shown below:


Image-to-Mesh Tools (e.g., Krea 2D-3D):
Krea can create a rough 3D mesh from a 2D image, allowing for interactive viewing and re-rendering from different angles. However, exporting these models is not currently supported, and the meshes may lack architectural detail needed to really use this developing the design. It is a new technology suited for early concept exploration, but it may soon develop into something much more powerful.


While these Image-to-Mesh and Image-to-Video methods offer alternative perspectives, one should note that currently you may find they often won’t provide the precision required for detailed architectural modeling.
Conclusion: Merging the 2D and 3D World
By integrating AI rendering engines into your architecture workflow, you can enhance design development, create comprehensive visual narratives, and produce polished images with minimal time spent modeling. This approach is valuable for evolving AI-generated concepts and exploring variations of existing projects and is an important tool to consider for architects looking to integrate AI into their practice.
For more AI tool tips and detailed workflow guides, subscribe to our newsletter and explore additional posts on Pixels To Plans, where we delve into the fusion of architecture, urbanism, and AI.
Other Posts You Might Like:

About the Author
AcanthusAlchemist
Designer and engineer exploring the intersection of AI, architecture, and urbanism.
email: acanthus@pixelstoplans.com
Subscribe to Our Free Newsletter
Interested in exploring other AI generated architecture concepts and design workflows? Sign up for our free mailing list to be notified whenever we post new content here on Pixels to Plans.
rendering